
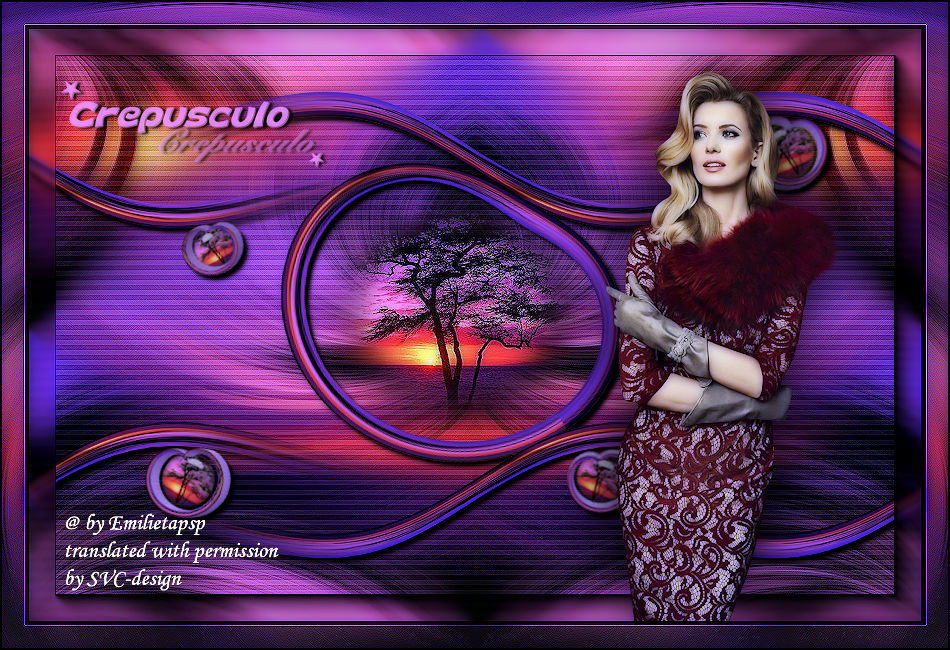
This lesson is made with PSPX9
But is good with other versions.
© by SvC-Design

Materialen Download :
Here
******************************************************************
Materials:
0_273abe_b8a3c7a2_orig.png
Adorno.png
misted.png
paisaje.jpg
Texto.png
******************************************************************
Plugin:
Plugin - Mura Meister - Pole transform
Plugin – Carolaine and sensibility - CS HLines
Plugin – AAA frame – foto frame
******************************************************************
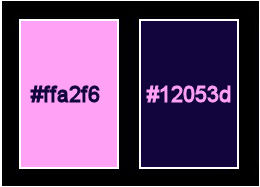
color palette
:
******************************************************************
methode
When using other tubes and colors, the mixing mode and / or layer coverage may differ
******************************************************************
General Preparations:
First install your filters for your PSP!
Masks: Save to your mask folder in PSP, unless noted otherwise
Texture & Pattern: Save to your Texture Folder in PSP
Selections: Save to your folder Selections in PSP
Open your tubes in PSP
******************************************************************
We will start - Have fun!
Remember to save your work on a regular basis
******************************************************************
1.
create a gradient with the following setting
Foreground color :#ffa2f6
Background color :#12053d
2.
Open a new transparent image of 900x600 pixels
Selection - Select All
Open paisaje.jpg
Edit – Copy
Edit - Paste into selection
Selection - Select None
3.
Adjust – blur – motion blur
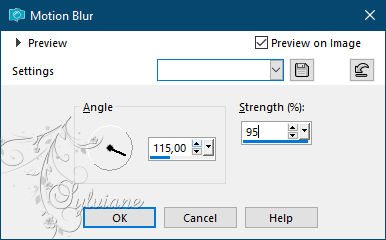
Effects – geometric effects – perspective horizontal
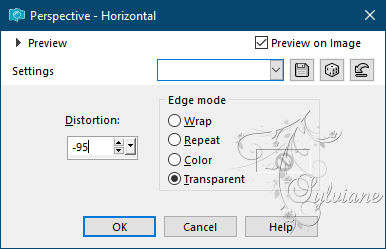
Image - Mirror – mirror Horizontal
Effects – geometric effects – perspective horizontal

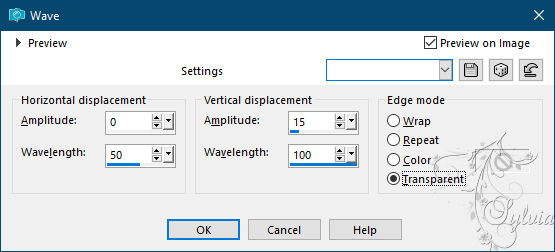
Effects - distortion effects - wave
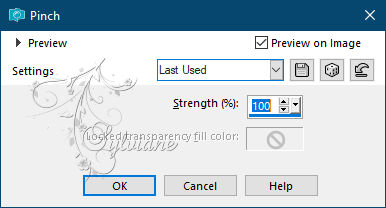
Effects - Distortion effects – pinch -100
Effects - Image Effects - Offset

Layers - Duplicate
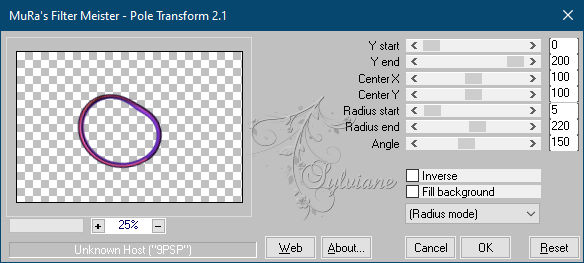
Plugin - Mura Meister - Pole transform
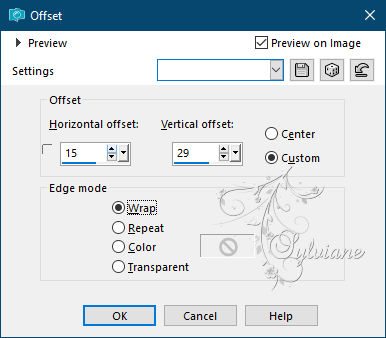
Effects - Image Effects - Offset
Layers – arrange – move down
We close the eye of this image
4.
We activate Raster 1
Layers - Duplicate
Image - Mirror - Vertical Mirror
Layers - Merge - Merge visible layers
Effects - Image Effects - Seamless Tiling
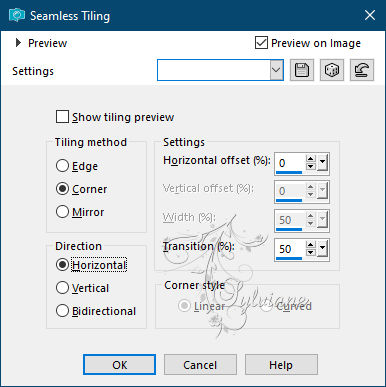
5.
We open Copy of Raster 1
With the wand in tolerance 0, cast 0, we select the inside of the frame copy
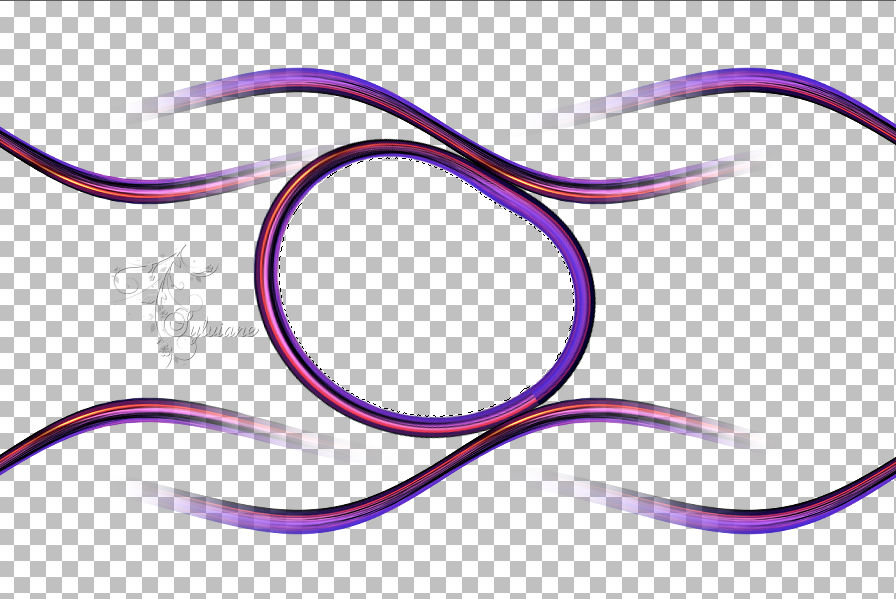
Selections – modify – expand – 2 pixels
Layers - New Raster Layer
Open misted.png
Edit – Copy
Edit - Paste into selection
Adjust – scharpness – scharpen
Selection - Select None
Layers - Merge - Merge visible layers
6.
Layers - New Raster Layer
Selection - Select All
Open paisaje.jpg
Edit – Copy
Edit - Paste into selection
Selection - Select None
Adjust - blur - radial blur
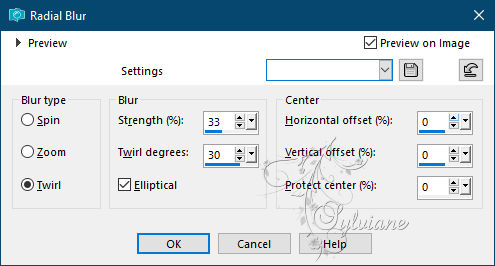
Effects - Edge Effects - Enhance
Plugin – Carolaine and sensibility - CS HLines

Effects - Edge Effects - Enhance
Effects - Image Effects - Seamless Tiling - default
Image - Mirror – mirror Horizontal
Effects – reflection effects – rotating mirror - as before
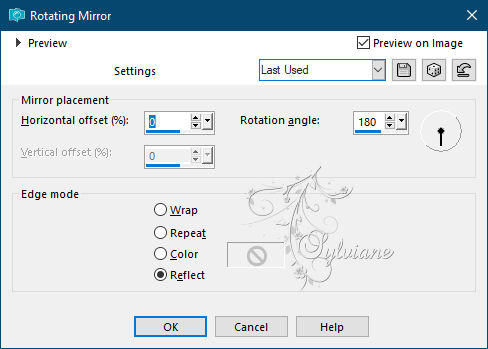
Activate the bottom layer
Layers – arrange – bring to top
Effects - 3 D effects - Drop shadow
5/5/100/5 color:#000000
7.
Open Adorno.png
Edit - Copy
Edit - Paste as new layer
Effects - Image Effects - Offset
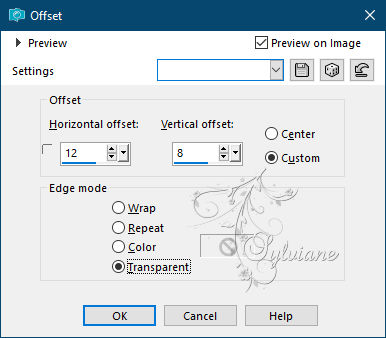
Effects - 3 D effects - Drop shadow
5/5/100/5 color:#000000
Layers - Merge - Merge visible layers
Plugin – AAA frame – foto frame
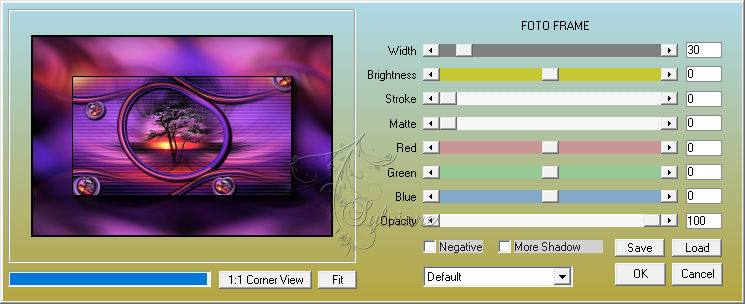
8.
Open 0_273abe_b8a3c7a2_orig.png
Edit - Copy
Edit - Paste as new layer
Resize to 55%
Image - Mirror – mirror Horizontal
Effects - Image Effects - Offset
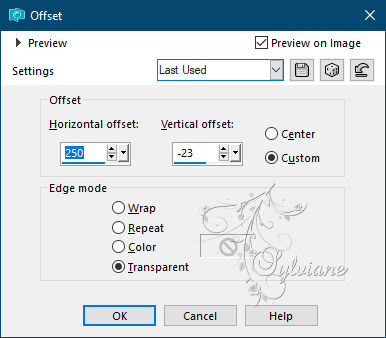
Effects - 3 D effects - Drop shadow
0/0/100/100 color:#000000
Layers - Merge - Merge visible layers
Plugin – AAA frame – foto frame - 3
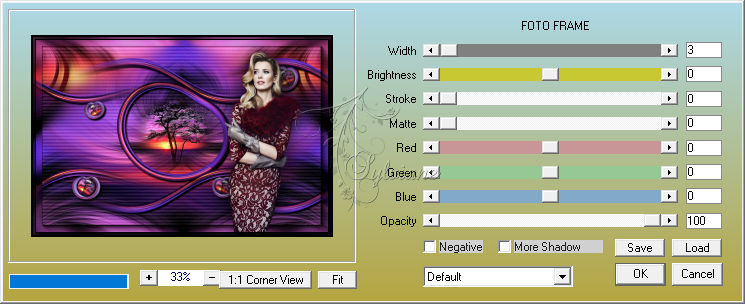
9.
Image - Add Borders - 40 pixels – color: foreground
Select with the wand
Open paisaje.jpg
Edit – Copy
Edit - Paste into selection
Adjust - blur - radial blur as at the beginning

Effects – reflection effects – rotating mirror

Effects - Edge Effects – Enhance (2x)
Selection - Select None
10.
Open Texto.png
Edit - Copy
Edit - Paste as new layer
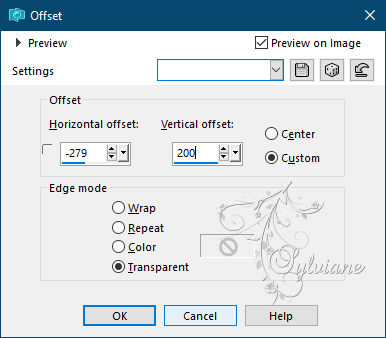
Effects - Image Effects - Offset
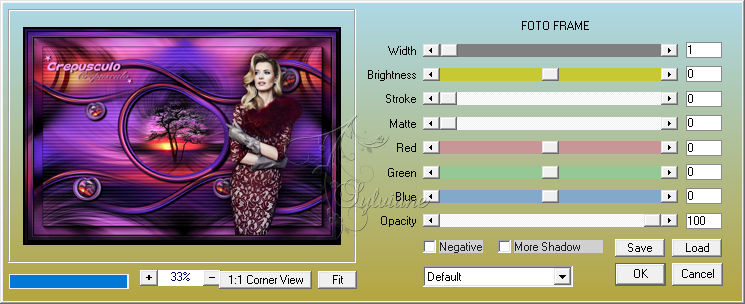
Plugin – AAA frame – foto frame
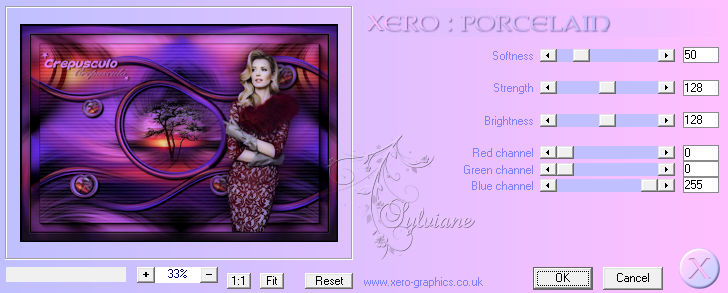
plugin - Xero - Porcelain
put your watermark on it
Layer – merge – merge all (flatten)
Adjust – scharpness – scharpen
Save as JPEG
Back
Copyright Translation © 2021 by SvC-Design